- 0. Login
- 1. Agent company
- 2. New Transfer
- 3. Purchaser
- 4. Route
- 5. Partner - driver
- 6. Passenger
- 7. Payment
- 8. Status
- 9. Return transfer
- 10. Calendar
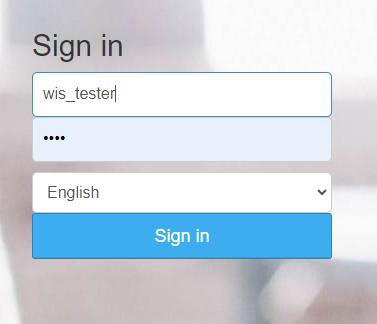
1. Agent company
If you do not have an agency in the system that is a transfer orderer, you should create one, similar to how a partner company is created.
2. New Transfer
You will create a new (empty) passenger transfer order. The order will automatically receive the order number and date. Order status will be TEMP (temporary).
To create a new blank order, press the NEW button in the lower right corner.
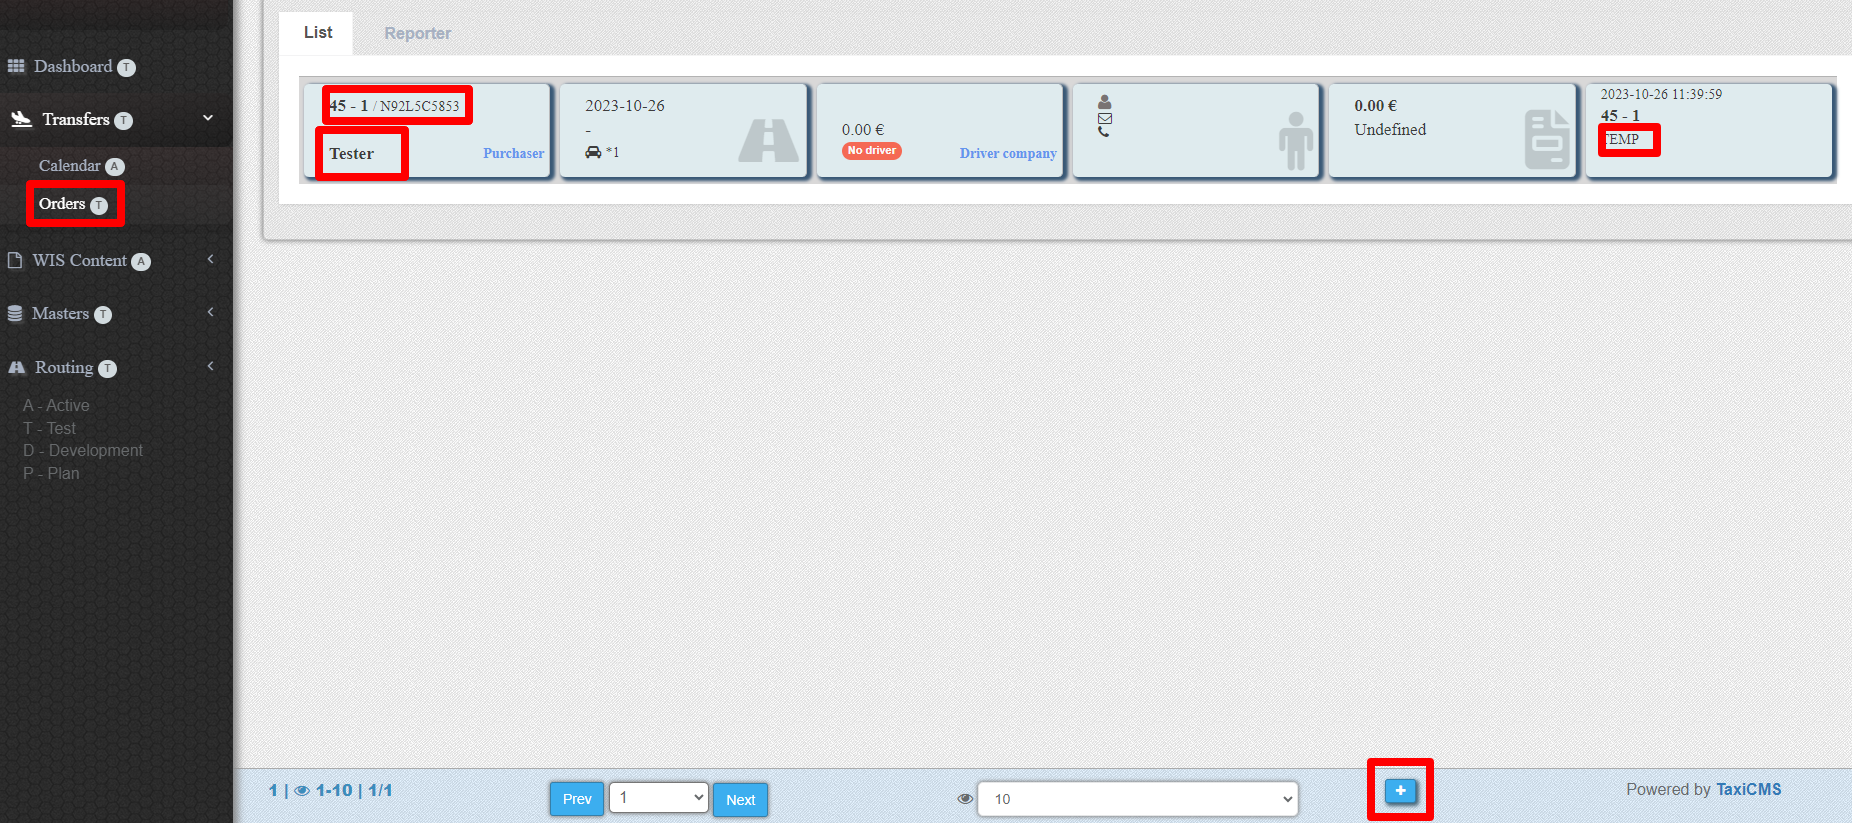
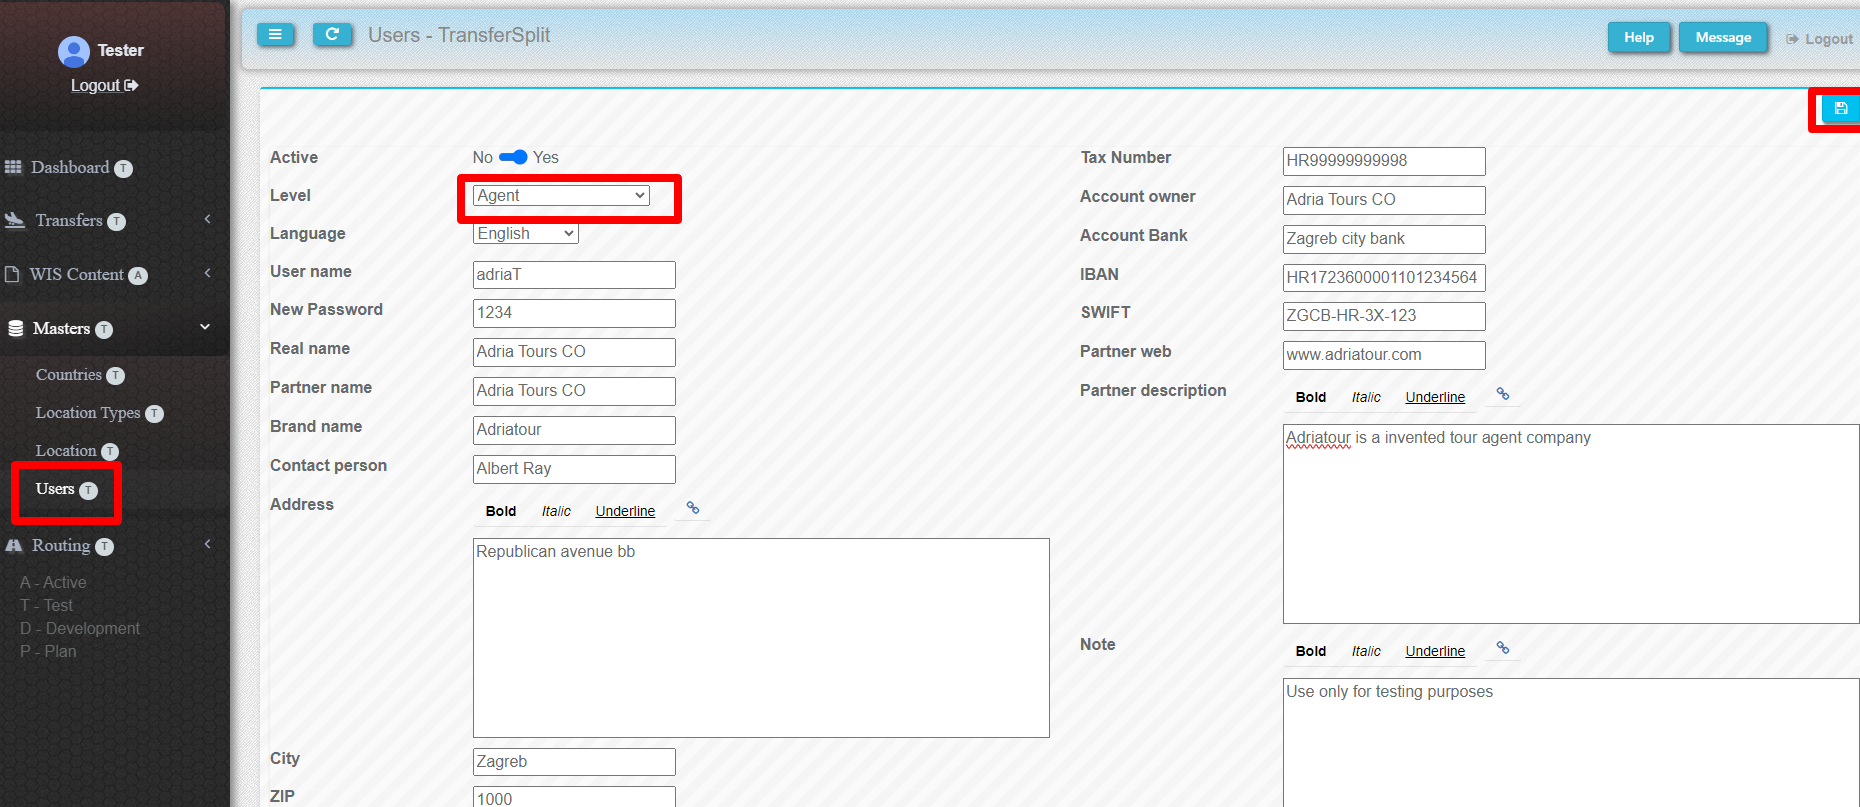
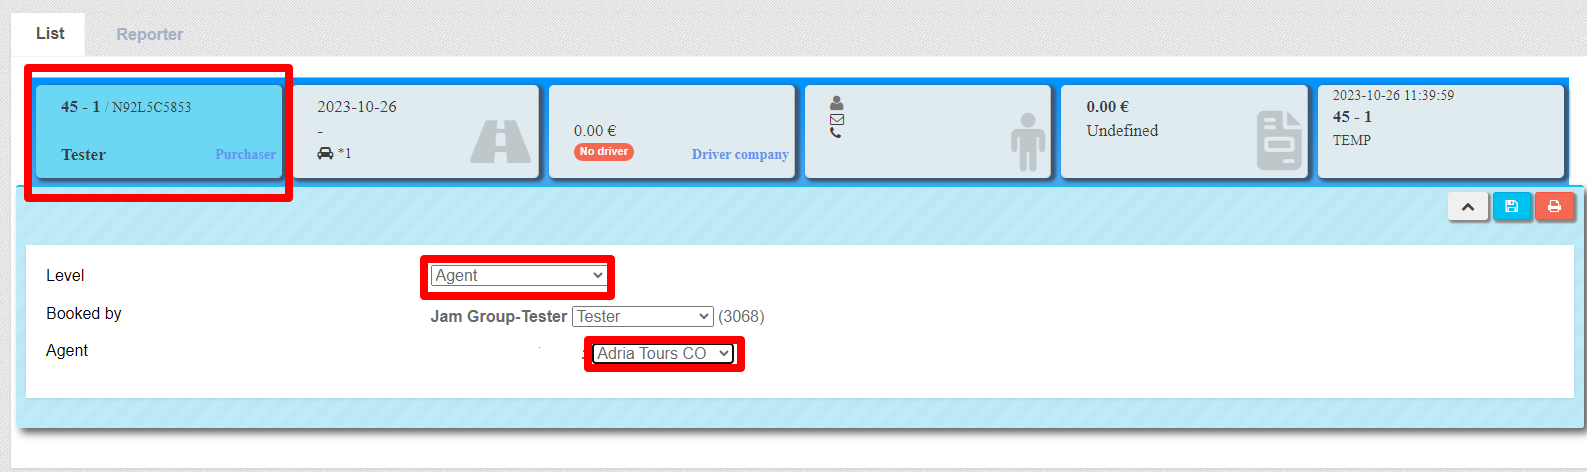
3. Purchaser
You need to set up a customer. If it's an agent, you'll select the agent level. You will also be set the user who books the order. By default, it is your account that you are logged in with.
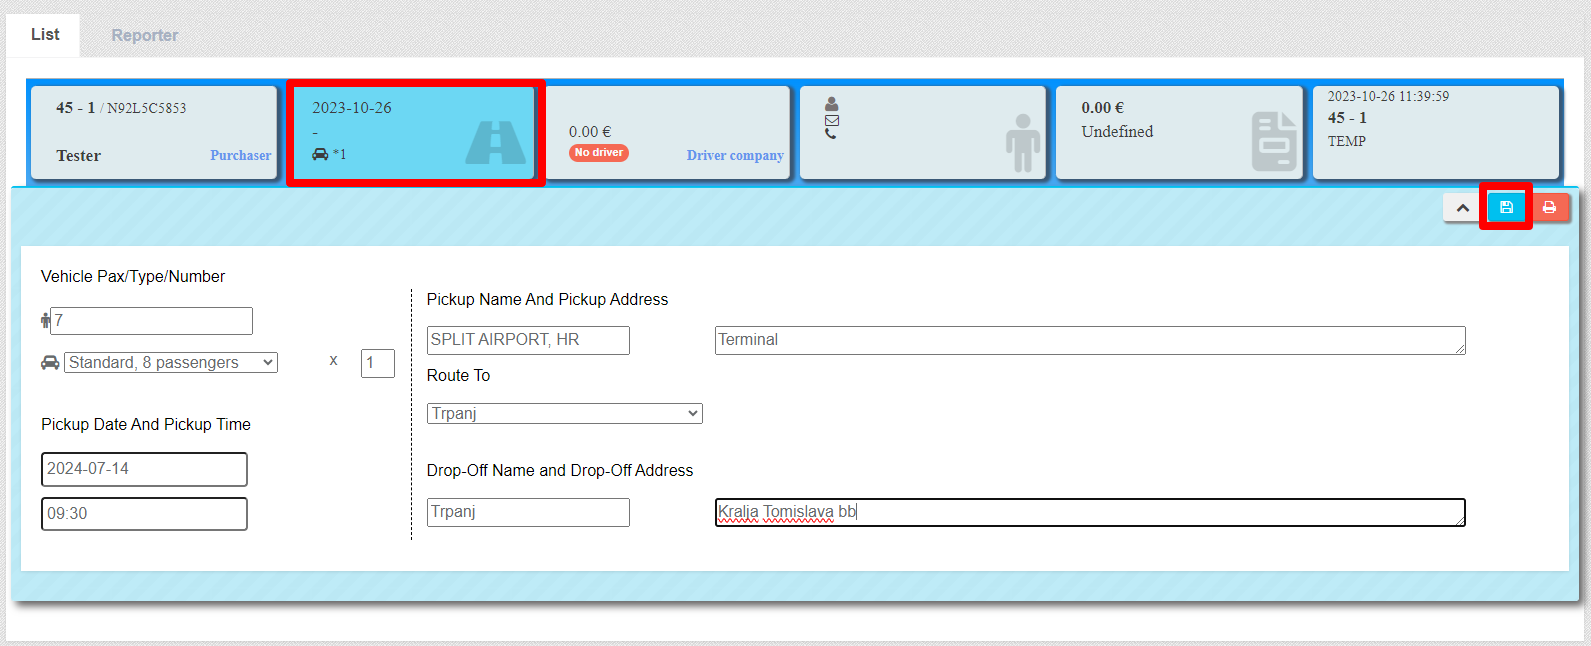
4. Route
- Fill the number of passengers.
- In relation to that number and the desired level of service, choose the type of vehicle from the list offered.
- Fill the day and time of the transfer.
- Fill The route on the right side.
- Form the Pickup location. Type the first three letters. Find and press the desired location.
- If desired location is not in the list, it should be entered letter by letter.
- Fill the address of the pickup location.
- If a defined location is selected, the list of routes is being filled. It contents the Drop off locations from routes whose pickup point is the selected location.
- Choose the drop off location, which is automatically entered in the field below.
- If desired route is not there, choose or enter the drop off location in the same way as the pickup.
- Fill the address of drop location.
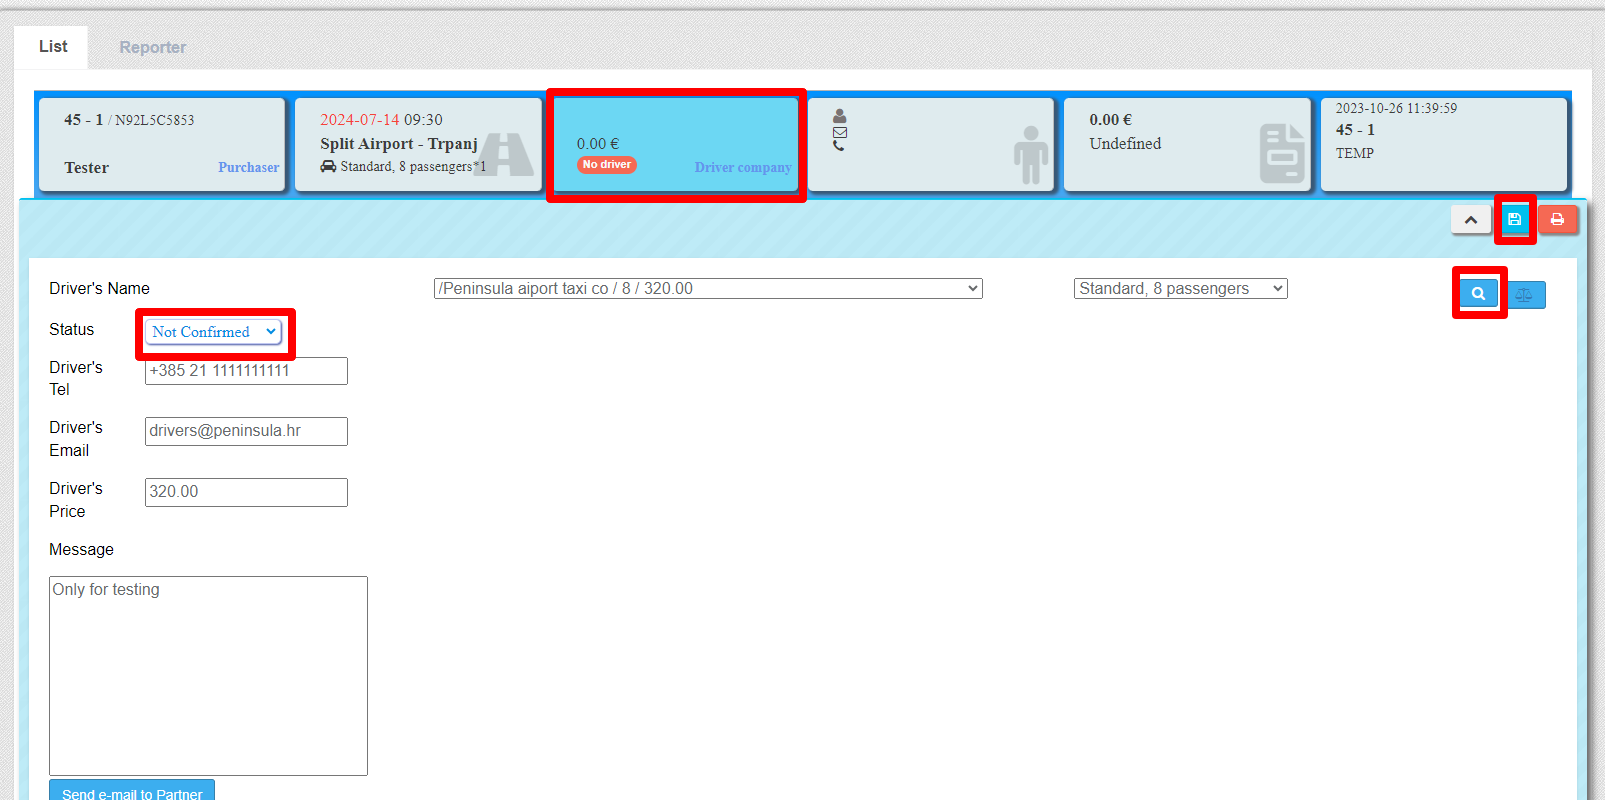
5. Partner - driver
Option 1
Select driver from select box
Fill Driver's price
Option 2
Press the button magnifying glass
Choose the appropriate service
Press on - name of the partner
Fill Driver's price
Option 3
Press the button magnifying glass
Choose the appropriate service
Press on - final price
Changed Status from No driver to Not Confirmed.
Edit fields about a driver
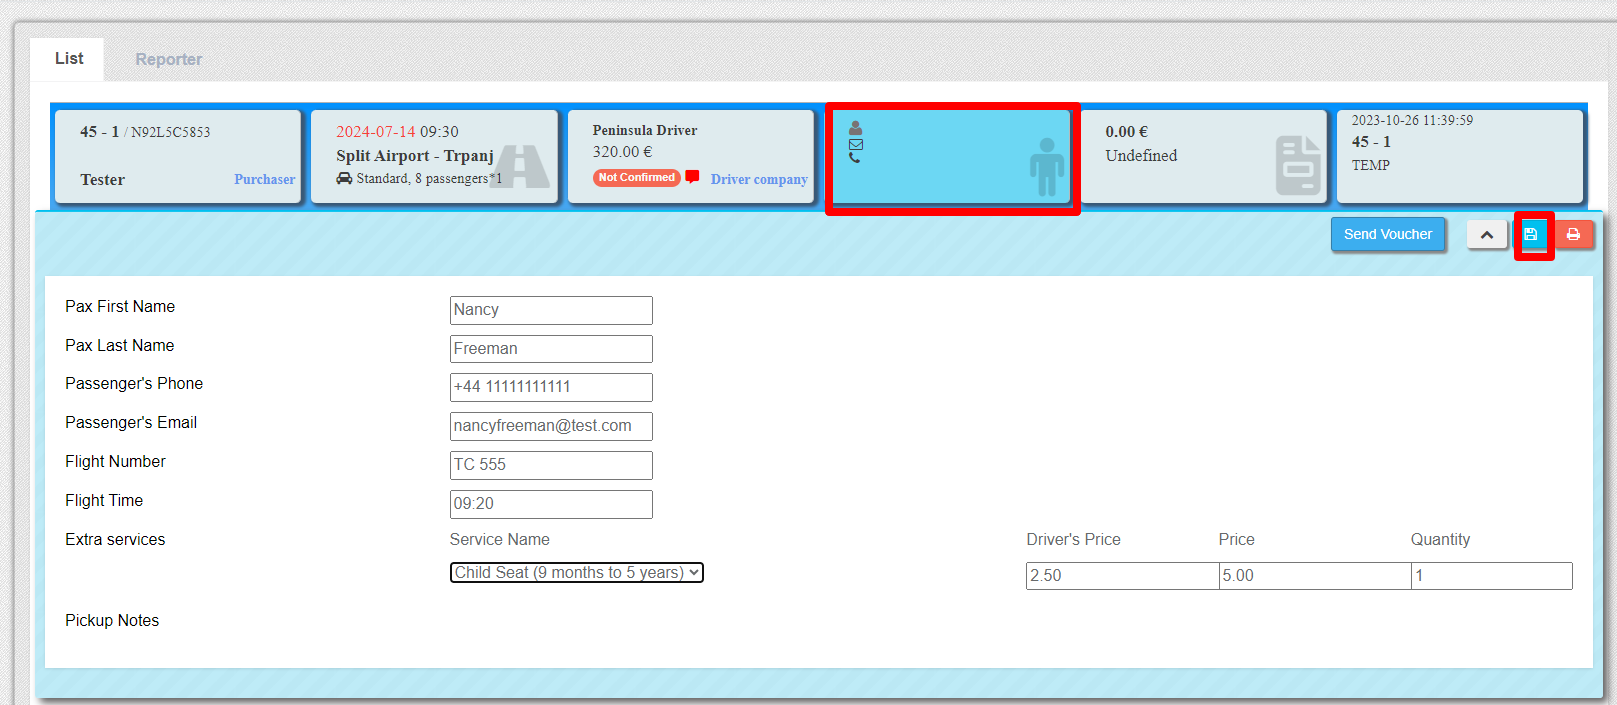
6. Passenger
- Fill first and last name, phone number and email
- Enter the country code for the phone
- Enter the flight number and the time of arrival or departure
- Select the extra service and fill the prices for it
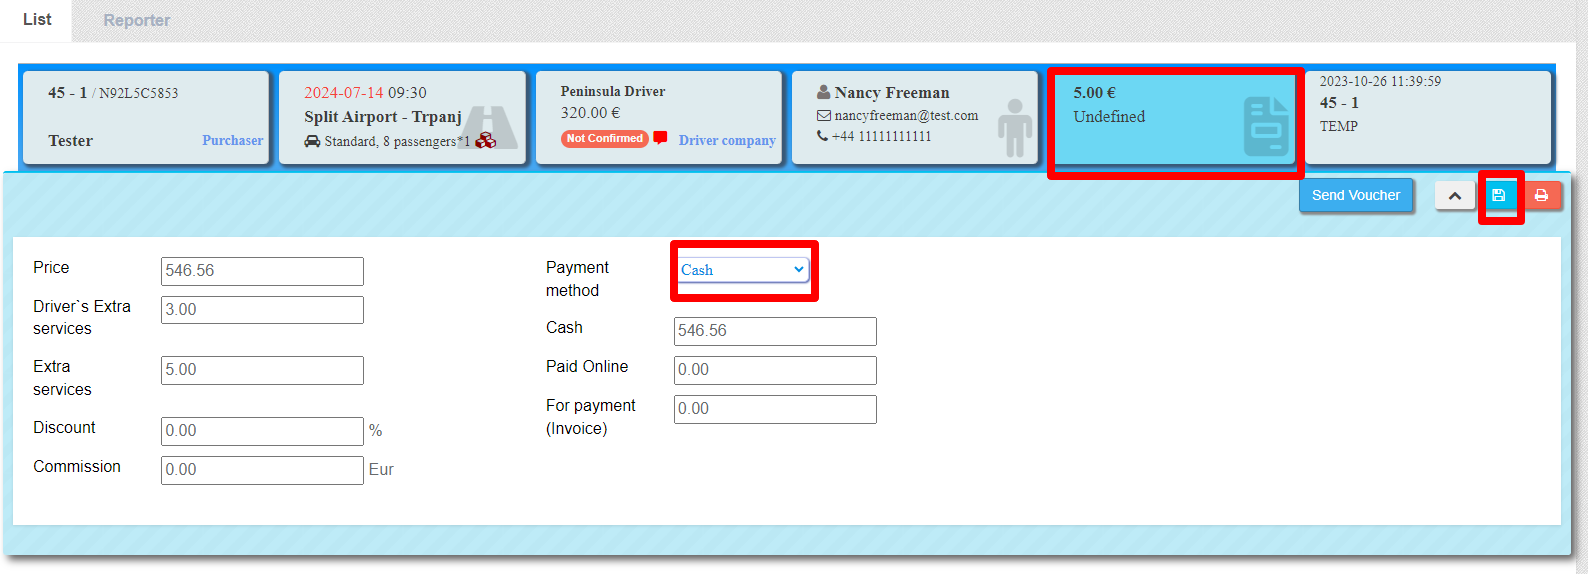
7. Payment
- Check and edit previously entered data.
- Select Payment type
- Fill in the fields for different payment types according to the selected type
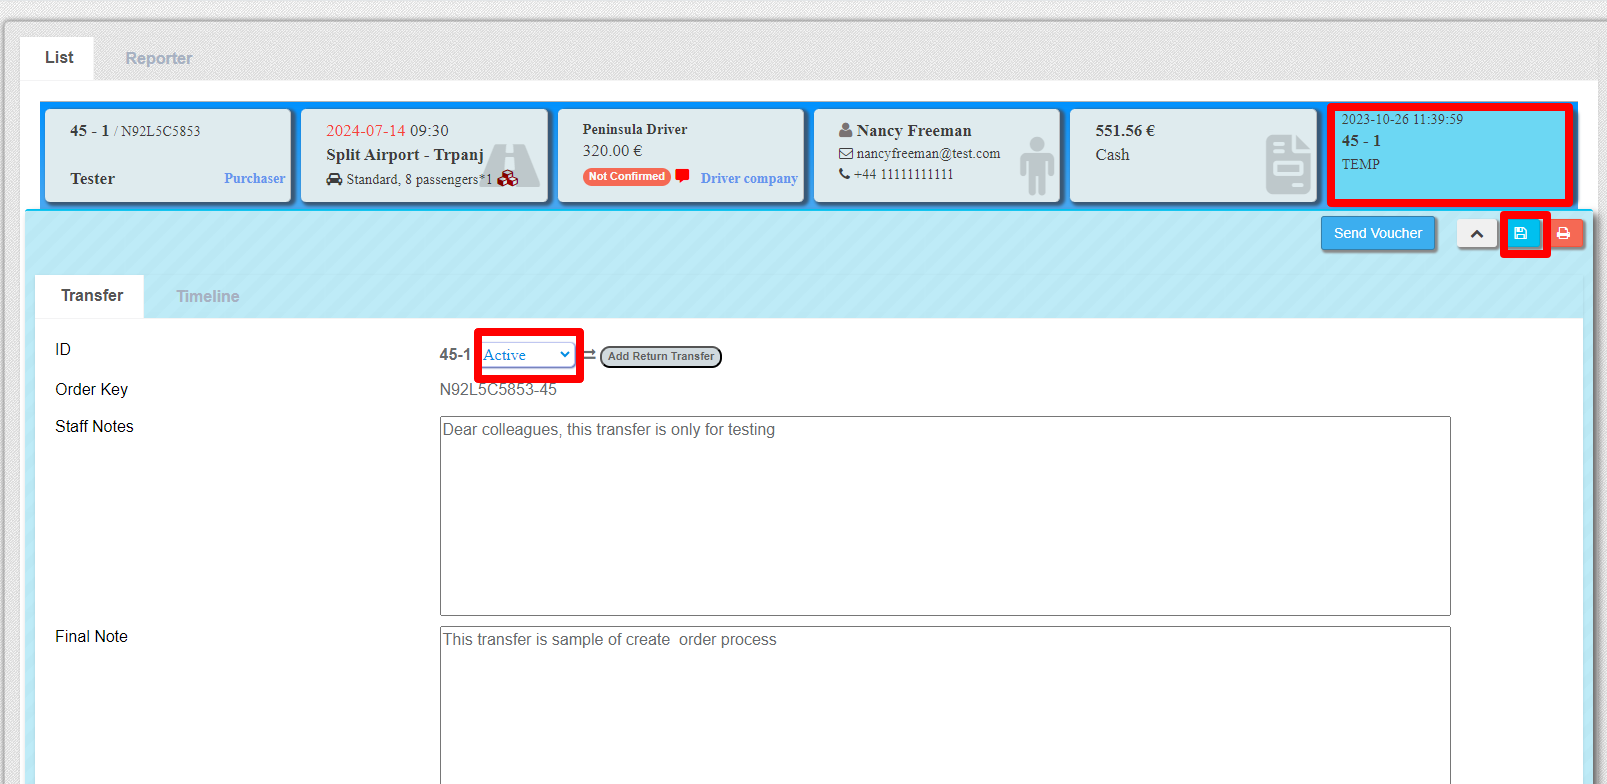
8. Status
- Change status to Active
- Fill the messages boxes
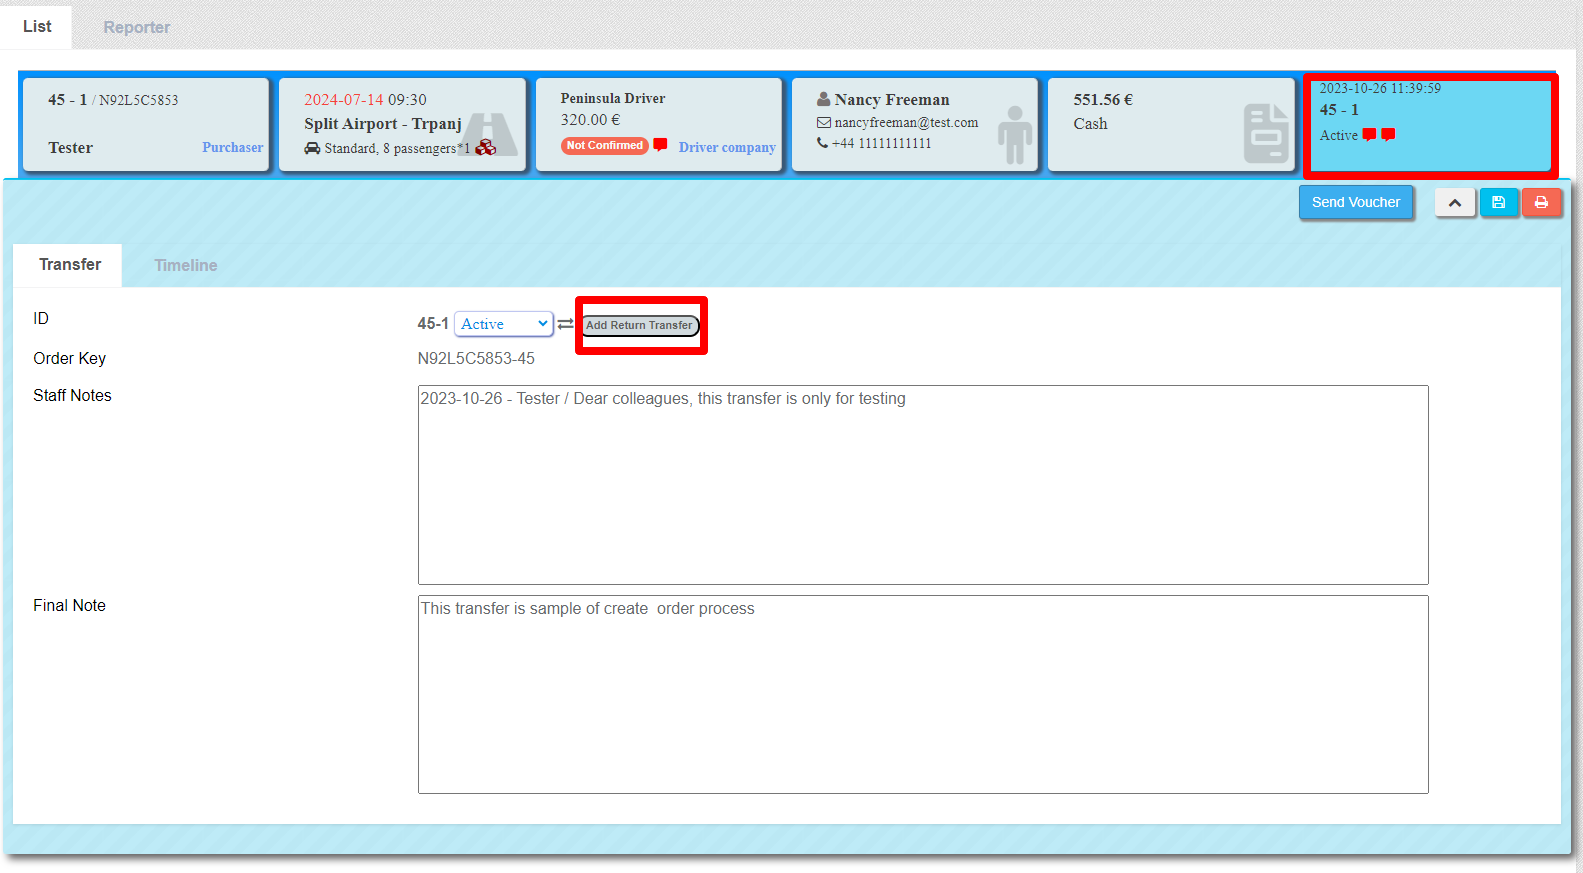
9. Return transfer
The return transfer is automatically created by copying the necesary data from the outgoing transfer.
- Press the button to create a return transfer (6.tab)
- Change the time for the return transfer (2.tab)
- Change the Flight time and Flight number (4.tab)
- Add the same or different extra service (4.tab)
- Activate this return transfer (6.tab)
- Change the driver and final price according to the return transfer discount defined in the driver's vehicle types option
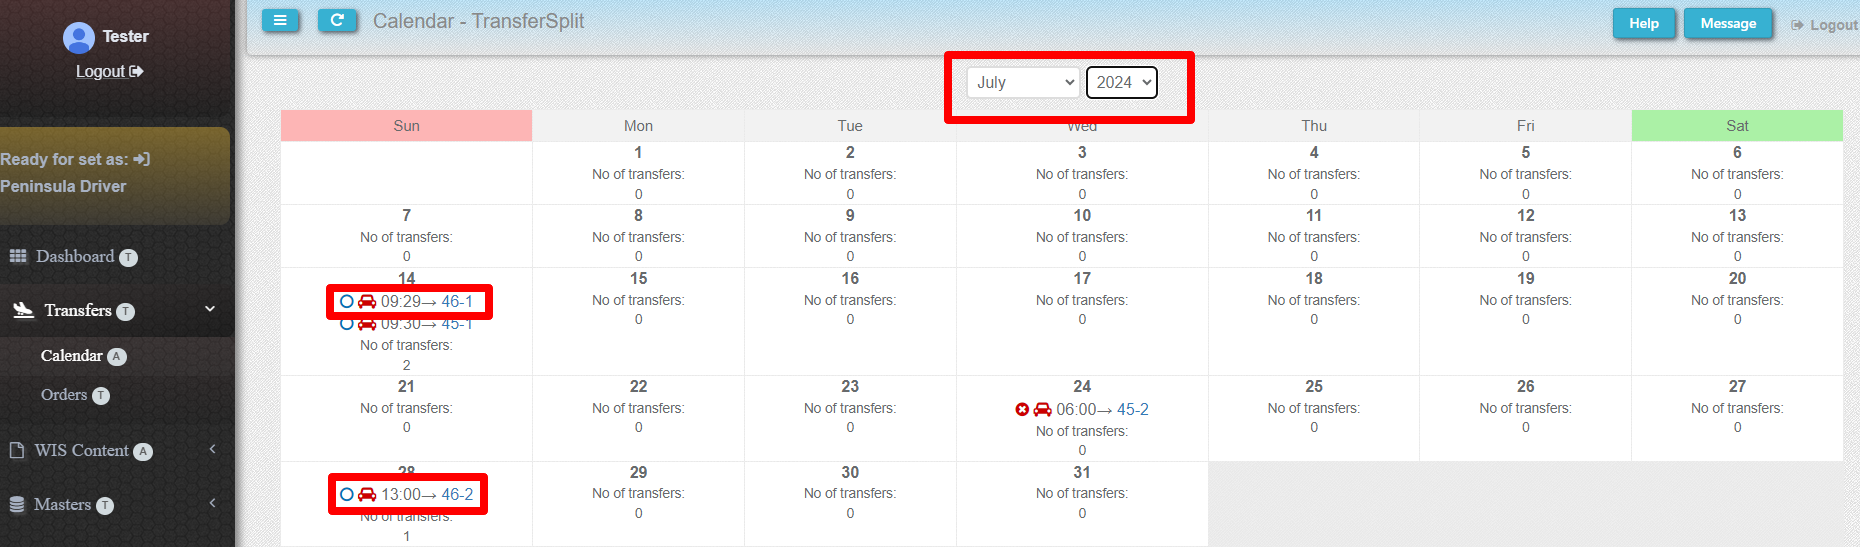
10. Calendar
- To check the entered order, the Calendar option can be used
- Select the month and year of the transfer
- Find a suitable transfer
- The link leads to detailed transfer information in the Orders option